
Google Apps Script for Google Forms – 3 Business Automations
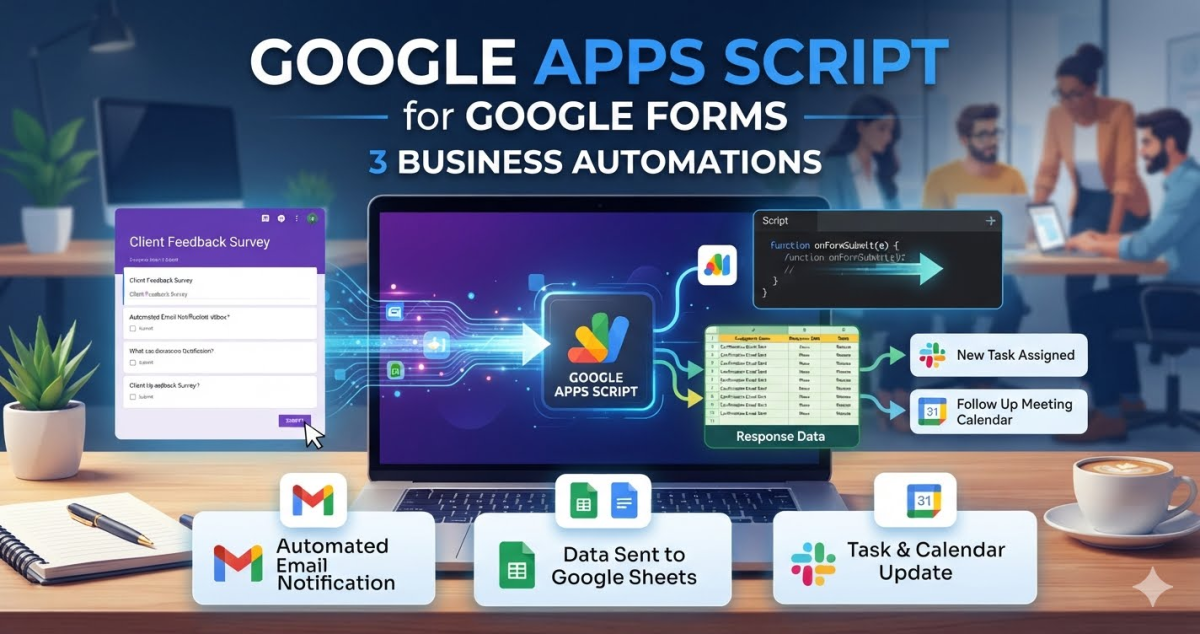
Google Forms handles collection. Everything after – confirmation emails, CRM entries, PDF generation, webhook calls, you have to wire up yourself. Google Apps Script is the native way to do that: it runs inside Google’s infrastructure, has built-in access to Gmail, Drive, and Sheets, and costs nothing.
This guide covers the foundation first (the trigger model and event object, where most setups break) then builds three real business automations on top of it.
Form Bound vs. SheetBound Scripts – Understand This First
This is the decision that shapes everything else, including which event object your code receives.
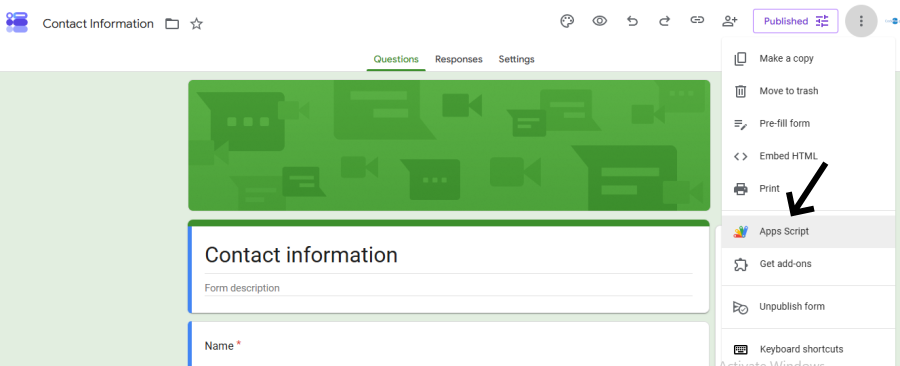
A form bound script lives inside the form itself. Open your form → three-dot menu (⋮) → Apps Script. The editor opens already connected to that form. You can call FormApp.getActiveForm() with no arguments.
A Sheet-bound (or standalone) script lives in a separate Apps Script project or inside the linked response spreadsheet. You reach the form by ID: FormApp.openById('YOUR_FORM_ID').
For the automations in this guide, the form-bound approach is used throughout, it has the cleanest trigger setup and is the right starting point for most use cases.
Step 1: Open the Apps Script Editor
Inside your Google Form, click the three-dot menu in the top right and select Apps Script. A new editor tab opens with a blank Code.gs file. All the code below goes here.
Step 2: Understand the Event Object
When a form is submitted, Apps Script passes an event object (conventionally e) to your handler function. What’s inside e depends entirely on whether your script is form-bound or Sheet-bound. Mixing these up causes silent failures or TypeError: Cannot read properties of undefined.
Form bound script: e.response
function onFormSubmit(e) {
  const formResponse = e.response;              // FormResponse object
  const items = formResponse.getItemResponses();

  items.forEach(itemResponse => {
    const question = itemResponse.getItem().getTitle();
    const answer   = itemResponse.getResponse();
    Logger.log('%s: %s', question, answer);
  });

  // Collected automatically if "Collect email addresses" is on in Form Settings
  Logger.log('Submitted by: %s', formResponse.getRespondentEmail());
}
getRespondentEmail() only returns a value if Collect email addresses is enabled in your form’s settings. Do not try to parse the respondent’s email from a form field — use this method.
Sheet-bound script: e.values and e.namedValues
If your script lives in the linked response spreadsheet instead of the form, the event object is completely different:
function onFormSubmit(e) {
  const rowValues = e.values;       // Array of answers in column order
  const named     = e.namedValues;  // Object keyed by question title

  Logger.log(rowValues);             // ['2026-01-15 10:30', 'Jane', '[email protected]']
  Logger.log(named['Email']);        // ['[email protected]'] — always an array, even for one answer
}
Note that e.namedValues values are always arrays named['Email'][0] to get the string.
If your form-bound code tries to use
e.values, it will beundefined. Match the event object to where your script actually lives.
Step 3: Install the onFormSubmit Trigger
Naming your function onFormSubmit does not make it run automatically. Form submit is not a simple trigger — it requires an installable trigger that you register explicitly.
Option A: Through the UI (easiest)
- In the Apps Script editor, click the clock icon (Triggers) in the left sidebar.
- Click + Add Trigger.
- Set: Function →
onFormSubmit, Event source → From form, Event type → On form submit. - Save and approve the permissions prompt.
Option B: Programmatically (better for scripts you deploy repeatedly)
Run this setup function once from the editor. It removes any existing triggers for the function first so you never create duplicates:
function createFormSubmitTrigger() {
  const form = FormApp.getActiveForm();

  // Remove duplicate triggers before creating a new one
  ScriptApp.getProjectTriggers().forEach(trigger => {
    if (trigger.getHandlerFunction() === 'onFormSubmit') {
      ScriptApp.deleteTrigger(trigger);
    }
  });

  ScriptApp.newTrigger('onFormSubmit')
    .forForm(form)
    .onFormSubmit()
    .create();

  Logger.log('Trigger installed.');
}
Select createFormSubmitTrigger in the function dropdown, click Run, and approve permissions. You only need to do this once. From that point, every form submission fires your onFormSubmit function.
Google Apps Script Automations for Google Forms
Automation 1: Send a Confirmation Email on Submit
The most common use case, email the respondent immediately after they submit.
function onFormSubmit(e) {
  const formResponse = e.response;
  const email = formResponse.getRespondentEmail();

  if (!email) {
    Logger.log('No respondent email collected. Check Form Settings > Collect email addresses.');
    return;
  }

  // Build a summary of their answers
  let summary = '';
  formResponse.getItemResponses().forEach(item => {
    summary += `${item.getItem().getTitle()}: ${item.getResponse()}\n`;
  });

  GmailApp.sendEmail(
    email,
    'We received your submission',
    `Hi,\n\nThank you for getting in touch. Here is what we received:\n\n${summary}\nWe will be in touch within 1 business day.\n\nBest regards,\nThe Team`
  );

  Logger.log('Confirmation sent to: ' + email);
}
Sending HTML email
GmailApp.sendEmail accepts a fourth options argument. Pass htmlBody to send a formatted version alongside the plain-text fallback:
const htmlBody = `
  <p>Hi,</p>
  <p>Thank you for getting in touch. We received your submission and will respond within 1 business day.</p>
  <p>Best regards,<br>The Team</p>
`;

GmailApp.sendEmail(email, 'We received your submission', plainTextBody, { htmlBody: htmlBody });
Gmail sending quota
GmailApp.sendEmail is subject to Google’s daily sending limits, which differ between personal Google accounts and Google Workspace accounts. Before deploying to a high volume form, check the Apps Script quotas page for current limits.
Automation 2: Send Form Leads to a CRM
Once the trigger foundation is solid, pushing data to a CRM is just an authenticated HTTP POST using UrlFetchApp.fetch(). The pattern below targets the HubSpot Contacts v3 API but the structure is the same for any REST-based CRM.
Store your API token securely
Never hard code API keys in your script. Instead, store them in Script Properties:
- In the Apps Script editor, click the gear icon → Project Settings.
- Scroll to Script Properties → Add property.
- Key:
HUBSPOT_TOKEN, Value: your HubSpot Private App access token.
Retrieve it at runtime with:
const token = PropertiesService.getScriptProperties().getProperty('HUBSPOT_TOKEN');This keeps the token out of your source code entirely.
Full CRM lead push example
function onFormSubmit(e) {
  const formResponse = e.response;
  const email = formResponse.getRespondentEmail();

  if (!email) {
    Logger.log('No email collected — cannot create CRM contact.');
    return;
  }

  // Read answers into a keyed object by question title
  const answers = {};
  formResponse.getItemResponses().forEach(item => {
    answers[item.getItem().getTitle()] = item.getResponse();
  });

  const firstName = answers['First name'] || '';
  const lastName  = answers['Last name']  || '';
  const phone     = answers['Phone']      || '';

  const token = PropertiesService.getScriptProperties().getProperty('HUBSPOT_TOKEN');
  if (!token) {
    Logger.log('HUBSPOT_TOKEN not set in Script Properties.');
    return;
  }

  const payload = JSON.stringify({
    properties: {
      firstname:      firstName,
      lastname:       lastName,
      email:          email,
      phone:          phone,
      hs_lead_status: 'NEW'
    }
  });

  const options = {
    method:             'post',
    contentType:        'application/json',
    headers:            { Authorization: 'Bearer ' + token },
    payload:            payload,
    muteHttpExceptions: true  // Returns the response instead of throwing on 4xx/5xx
  };

  const response     = UrlFetchApp.fetch('https://api.hubapi.com/crm/v3/objects/contacts', options);
  const responseCode = response.getResponseCode();
  const responseBody = response.getContentText();

  if (responseCode === 201) {
    Logger.log('HubSpot contact created.');
  } else if (responseCode === 409) {
    // 409 Conflict = contact with this email already exists
    Logger.log('Contact already exists in HubSpot for: ' + email);
  } else {
    Logger.log('HubSpot error ' + responseCode + ': ' + responseBody);
  }
}
Why muteHttpExceptions: true matters
Without it, UrlFetchApp.fetch() throws a JavaScript exception on any 4xx or 5xx response, which makes it impossible to read the error body or handle specific status codes like 409. With it set to true, the call always returns a response object you can inspect.
Automation 3: POST Form Data to Any REST API
The CRM example above is a specific case of a general pattern. If your target is a custom backend, a webhook receiver, or any other REST endpoint, the same UrlFetchApp.fetch() call works.
function onFormSubmit(e) {
  const formResponse = e.response;

  // Build a keyed object from all answers
  const answers = {};
  formResponse.getItemResponses().forEach(item => {
    answers[item.getItem().getTitle()] = item.getResponse();
  });

  const apiEndpoint = PropertiesService.getScriptProperties().getProperty('API_ENDPOINT');
  const apiKey = PropertiesService.getScriptProperties().getProperty('API_KEY');

  const payload = JSON.stringify({
    email: formResponse.getRespondentEmail(),
    name: answers['Full name'] || '',
    message: answers['Message']   || '',
    source: 'google-form'
  });

  const options = {
    method: 'post',
    contentType: 'application/json',
    headers: { 'X-API-Key': apiKey },
    payload: payload,
    muteHttpExceptions: true
  };

  const response = UrlFetchApp.fetch(apiEndpoint, options);
  Logger.log(response.getResponseCode() + ': ' + response.getContentText());
}
GET requests with query parameters
For APIs that accept GET requests, build the URL string manually and encode user supplied values:
const url = 'https://api.example.com/notify'
          + '?email=' + encodeURIComponent(formResponse.getRespondentEmail())
          + '&name='  + encodeURIComponent(answers['Full name'] || '');

const response = UrlFetchApp.fetch(url, { method: 'get', muteHttpExceptions: true });
Always encodeURIComponent() values you append to a URL. A respondent with & or = in their name will corrupt the query string without it.
Common Google App Script Errors and How to Fix Them
Cannot read properties of undefined (reading 'getItemResponses')
Your script is form-bound but you are using e.values or e.namedValues — those belong to Sheet-bound scripts. Use e.response.getItemResponses() in a form-bound script.
The function never runs
You named the function onFormSubmit but never installed the trigger. Naming alone is not enough for form submit. Run the setup function from Step 3 or add the trigger through the Triggers panel.
You do not have permission to call GmailApp.sendEmail
Run any function once manually from the editor to trigger the OAuth authorization prompt. Approve the scopes, then the trigger will have permission to use Gmail.
Trigger fires twice
You created the installable trigger more than once. Open the Triggers panel and delete the duplicates, or use the deduplication setup function in Step 3 which handles this automatically.
getRespondentEmail() returns an empty string
Email collection is not enabled. In your form go to Settings → Responses and turn on Collect email addresses.
API returns 401 or 403
The token in Script Properties is expired, incorrect, or missing the required scope. For HubSpot Private Apps, the token needs the crm.objects.contacts.write scope to create contacts.