In this tutorial, we have explained Paytm Payment Gateway Integration in PHP programming language. In today scenario Paytm is the most popular and trusted mobile wallet system. As per the Economic time’s survey Paytm reached approx 200 million registered users. Yes, that is a huge number.
After demonetization in India, Paytm become more popular. Now, most of the users pay Bills and transfer money via the Paytm service. It’s very easy to use and of course very fast.
Today many eCommerce or other service websites start using Paytm payment gateway. Its also reduce the risk to exposing credit card details or banking password. Just send or receive payment via your Mobile Phone. So, no doubt Paytm is a better service for online payment for your Website or Mobile App.
Steps to Integrate Paytm Payment Gateway in PHP
Let’s start the process of Paytm Payment Gateway Integration. It’s very easy to integrate in your application as compared to other payment gateways. Follow the below steps:
Step 1 : Register for Paytm Account
Sign Up for a Paytm business account from here: https://paytm.com/business/payments/online
During Sign up process, you need to choose the option that Paytm Payment Gateway requires for a Website or APP. Also submit a valid Redirect URL, where you want to redirect the user after successful payment received.
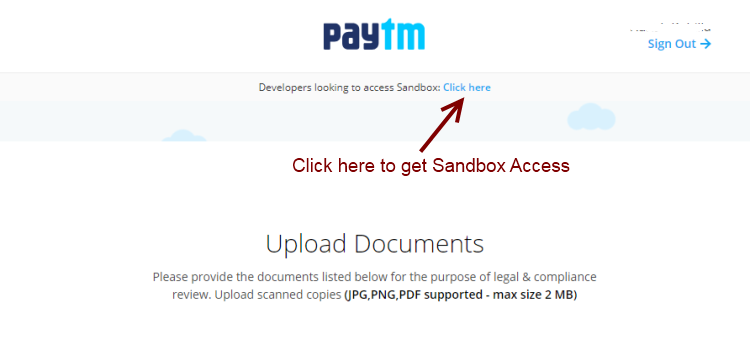
In the registration process, they ask for some official information like Business Types, addresses, Verification proof, Bank Details, etc. Although you can get Paytm sandbox credential without complete this process. But for production, you have to provide all required information.
After this, you will get Paytm Staging Credentials, which included Staging MID, Merchant Key, Industry Type, Website Name, and Channel ID. Paytm also send testing wallet details, which you can use for test transaction flow.
Note: All users must use Paytm with only an Indian registered number because the company hasn’t gone overseas except for Canada.
Step 2 : Download Official Paytm PHP Kit
Paytm official announced library source code in all languages. Just download Paytm Payment Gateway kit in PHP from GitHub. Extract the Zip file, there is the ‘PaytmKit’ folder which has all required files.
Step 3: Configure Paytm Credential
Open ‘config_paytm.php’ file in PaytmKit -> lib folder and update with the access credential you got from Paytm.
|
1 2 3 4 |
define('PAYTM_ENVIRONMENT', 'TEST'); // change value PROD for production define('PAYTM_MERCHANT_KEY', 'vsbi51****uKL0#3 '); define('PAYTM_MERCHANT_MID', 'codefi*****858443'); define('PAYTM_MERCHANT_WEBSITE', 'WEBS***ING'); |
By default source code ready for staging site. When you want to move to Production update the ‘PAYTM_ENVIRONMENT’ value by ‘PROD’.
Step 4: Create HTML Payment Form
After configuring the credential, your code is ready to process. Now create an HTML form to make the online transactions.
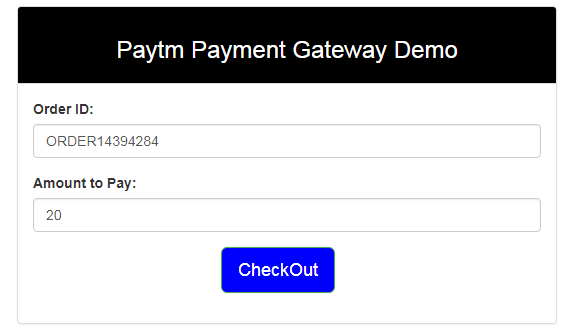
Form action should be to this file ‘pgRedirect.php’ inside PaytmKit folder. This file handle checksum and other require details and redirect to you Paytm payment page. After click on checkout button user can process the payment via the paytm wallet.
|
1 2 3 4 5 6 7 8 9 10 11 12 13 14 15 16 17 18 19 20 21 22 23 24 25 26 27 28 29 30 31 32 33 34 35 36 37 38 39 40 41 42 43 44 |
<!doctype html> <html> <head> <title>Patym Payment Gateway Integration in PHP</title> <link href="https://maxcdn.bootstrapcdn.com/bootstrap/3.3.7/css/bootstrap.min.css" type="text/css" rel="stylesheet" /> </head> <body> <div class="container" style="padding-top:100px;"> <div class="col-xs-6 col-xs-offset-3"> <div class="panel panel-default"> <div style="background-color: #000000; color:#fff" class="panel-heading"> <h3 class="text-center">Paytm Payment Gateway Demo</h3> </div> <div class="panel-body"> <form action="pgRedirect.php" method="post"> <input type="hidden" id="CUST_ID" name="CUST_ID" value="CUST001"> <input type="hidden" id="INDUSTRY_TYPE_ID" name="INDUSTRY_TYPE_ID" value="Retail"> <input type="hidden" id="CHANNEL_ID" name="CHANNEL_ID" value="WEB"> <div class="form-group"> <label>Order ID:</label> <input type="text" class="form-control" id="ORDER_ID" name="ORDER_ID" size="20" maxlength="20" autocomplete="off" tabindex="1" value="<?php echo "ORDER" . rand(10000,99999999)?>"> </div> <div class="form-group"> <label>Amount to Pay:</label> <input type="text" class="form-control" id="TXN_AMOUNT" name="TXN_AMOUNT" autocomplete="off" tabindex="5" value="20"> </div> <div class="form-group"> <input type="submit" name="submit" value="CheckOut" class="btn btn-success btn-lg" style="background- color:#0000FF; margin-left: 37%;"> </div> </form> </div> </div> </div> </div> </body> </html> |
In this form we are sending some required parameter as hidden variable like Channel ID, Industry Type and Customer ID. You have to pass these parameters along with form submit.
You May Also Like:
Code to Use Paypal Payment Gateway on Website
How to Integrate Dwolla Payment Gateway in Website
How to Integrate Barclaycard EPDQ Payment Gateway
For more information, visit Paytm official documentation and do changes as per your requirement. Using the above steps you can easily do the Paytm Payment Gateway Integration in PHP. We hope this tutorial helps you. Thanks
Hi Harish,
First of all thank you for your post.
When I tried your code, I am redirecting to https://securegw-stage.paytm.in/theia/processTransaction with the error “You are lost in Space.
ORDER ID: ORDER22996689”
I made the required changes to config_paytm.php file.
Hi Ravinder,
I think some issue in providing credential in config file.
Thanks
I did work your code. The page is getting redirected properly and the result is “checksum matched… transaction failure.. status;pending..”
It didn’t prompt me any paytm login. Suddenly this page got appeared after redirecting
Hi Deepak,
Is you not getting paytm payment page ? Please follow each step very carefully, i think you missed something.
how can i complete the account verification i donot have indian mobile number
Hi Azeem, As i now the users can use Paytm with only Indian registered number because the company hasn’t gone overseas except for Canada.
Its working, thanks for sharing it..
I have a problem What is default website name in prod.
Hi suman,
This is provided by Paytm and it defines the static response URL.
You can use these values “WEBSTAGING”, “DEFAULT”.
Hello Ravi,
When I am making test in TEST mode, it is ending up in this location https://developer.paytm.com/txn-response and showing this page does not exists. How I will come back to my site after a success or failure and reach and execute the response pages script in my site? It is in TEST mode..
Hi, please check Paytm PHP Kit. Here transaction status and page response file included. You can get all response in those file and can capture the data.
I have tried this but the data not getting on the response page because I have to send data to the database from the response page.
Hi nitin,
You can get all response values on ‘pgRedirect.php’ page. Is you redirected correctly after the payment form submit?
yes. payment got success but I want custom form data to be sent to the database.
Hi, I’m trying to add EMI option as well in this PayTm integration. But not able to do it. Suggest something.
Hi, not implemented EMI system before with this. I found related information here, hope this helps you. https://developer.paytm.com/docs/v1/custom-checkout/emi/
Hi Sir,
Gateway is working proper and after coming response page, why user logout from website,
i want if going payment response page we keep login continue.
url: https://aarfragrances.com/demo/index.php