Zooming image on mouseover feature make your website more fancy. You can implement this functionality via many ways like CSS, jQuery or JavaScript. In this article we are going to cover this topic.
You have seen this image zoom feature on many web application, like eCommerce or portfolio websites. This feature will give more closer view to users for your products and off-course make more interactive.
We are using ElevateZoom plugin to implement zoom image on mouseover using jQuery. This is wonderful plugin which comes with different type of zooming effect. Lets start how we can use this plugin:
jQuery Image Zoom on Mouse Hover
We have used ElevateZoom default options to create image zoom effect. Just called the inbuilt library function with the reference of image Id.
First download the elevatezoom plugin and include JavaScript files. We have loaded both below files and use elevateZoom() function to call default zoom settings.
|
1 2 |
<script src='jquery-1.8.3.min.js'></script> <script src='jquery.elevatezoom.js'></script> |
On mouse hover this elevatezoom() script method is called.
Now adding an image element with the small and large image. Prefer to use large image for better zoom effect.
|
1 |
<img id="zoom_01" src='images/small/image1.png' data-zoom-image="images/large/image1.jpg"/> |
Than adding the jQuery code to show image zoom effect on mouseover. This script will show you inner zoom effect on mouse hover.
|
1 2 3 4 5 6 7 8 9 10 |
<script> $('#zoom_01').elevateZoom({ zoomType: "inner", cursor: "crosshair", zoomWindowFadeIn: 500, zoomWindowFadeOut: 750 }); </script> |
As we told you using this plugin you can create different type of image zooming effect like Lens image zoom, Easing Zoom, Square Zoom, Tint zoom effect.
This plugin has many config option, you can change the settings to get require image zoom option. Lets see what we can do with these:
Tint Image Zoom Effect:
For getting this zooming effect we can set config attribute value in script method. like that:
|
1 2 3 4 5 6 7 8 9 |
<script> $("#zoom_01").elevateZoom({ tint:true, tintColour:'#F90', tintOpacity:0.5 }); <script> |
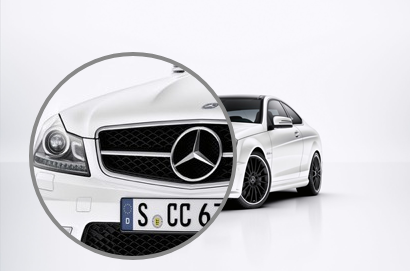
Lens Effect Image Zooming:
To get lens effect while zooming image, put below attribute value in script code.
|
1 2 3 4 5 6 7 8 9 |
<script> $("#zoom_01").elevateZoom({ zoomType : "lens", lensShape : "round", lensSize : 200 }); </script> |
Easing Zoom effect:
For easing zoom effect use ‘easing‘ attribute with Possible Values: “True”, “False”. You can change the easing duration by using this attribute ‘easingDuration‘, be default its value set to 2000. See the example below:
|
1 2 3 4 5 6 7 |
<script> $("#zoom_01").elevateZoom({ easing : true }); </script> |
Conclusion:
Implementing this plugin on your web application is quite easy process. The great part is that you can config the own zoom effect settings by using some attribute value. So just follow the above mentioned steps and your are good to go.
You May Also Like:
Simple jQuery Barcode Generator Example
Credit Card Number Validation Using jQuery
jQuery Interactive Parallax Effect for Background Layers
Using jQuery Email Autocomplete in HTML Form